
<!-- ####### YAY, I AM THE SOURCE EDITOR! #########-->
<h1 style=”color: #5e9ca0;”>You can edit <span style=”color: #2b2301;”>this demo</span> text!</h1>
<h2 style=”color: #2e6c80;”>How to use the editor:</h2>
<p>Paste your documents in the visual editor on the left or your HTML code in the source editor in the right. <br />Edit any of the two areas and
see the other changing in real time. </p>
<p>Click the <span style=”background-color: #2b2301; color: #fff; display: inline-block; padding: 3px 10px; font-weight: bold; border-radius: 5px-
;”>Clean</span> button to clean your source code.</p>
<h2 style=”color: #2e6c80;”>Some useful features:</h2>
<ol style=”list-style: none; font-size: 14px; line-height: 32px; font-weight: bold;”>
<li style=”clear: both;”><img style=”oat: left;” src=”https://html-online.com/img/01-interactive-connection.png” alt=”interactive connection”
width=”45” /> Interactive source editor</li>
<li style=”clear: both;”><img style=”oat: left;” src=”https://html-online.com/img/02-html-clean.png” alt=”html cleaner” width=”45” /> HTML Clean-
ing</li>
<li style=”clear: both;”><img style=”oat: left;” src=”https://html-online.com/img/03-docs-to-html.png” alt=”Word to html” width=”45” /> Word to
HTML conversion</li>
<li style=”clear: both;”><img style=”oat: left;” src=”https://html-online.com/img/04-replace.png” alt=”replace text” width=”45” /> Find and Re
-
place</li>
<li style=”clear: both;”><img style=”oat: left;” src=”https://html-online.com/img/05-gibberish.png” alt=”gibberish” width=”45” /> Lorem-Ipsum
generator</li>
<li style=”clear: both;”><img style=”oat: left;” src=”https://html-online.com/img/6-table-div-html.png” alt=”html table div” width=”45” /> Table
to DIV conversion</li>
<td>Remove inline styles</td>
<td><span style=”color: green; font-size: 13px;”>You <strong style=”color: blue; text-decoration: underline;”>should never</strong> use in
-
line styles!</span></td>
<td><strong style=”font-size: 17px; color: #2b2301;”>x</strong></td>
</tr>
<tr>
<td>Remove classes and IDs</td>
<td><span id=”demoId”>Use classes to <strong class=”demoClass”>style everything</strong>.</span></td>
<td><strong style=”font-size: 17px; color: #2b2301;”>x</strong></td>
</tr>
<tr>
<td>Remove all tags</td>
<td>This leaves <strong style=”color: blue;”>only the plain</strong> <em>text</em>. <img style=”margin: 1px;” src=”images/smiley.png” alt=”laugh
-
ing” width=”16” height=”16” /></td>
<td> </td>
</tr>
<tr>
<td>Remove successive &nbsp;s</td>
<td>Never use non-breaking spaces to set margins.</td>
<td><strong style=”font-size: 17px; color: #2b2301;”>x</strong></td>
</tr>
<tr>
<td>Remove empty tags</td>
<td>Empty tags should go!</td>
<td> </td>
</tr>
<tr>
<td>Remove tags with one &nbsp;</td>
<td>This makes no sense!</td>
<td><strong style=”font-size: 17px; color: #2b2301;”>x</strong></td>
</tr>
<tr>
<td>Remove span tags</td>
<td>Span tags with <span style=”color: green; font-size: 13px;”>all styles</span></td>
<td><strong style=”font-size: 17px; color: #2b2301;”>x</strong></td>
</tr>
<tr>
<td>Remove images</td>
<td>I am an image: <img src=”images/smiley.png” alt=”laughing” /></td>
<td> </td>
</tr>
trong> </strong></p>
<p><strong> </strong></p>
Code
Like a
Boss:
front end
development for
oracle eloqua

< INTRO / code like a boss />
by relationship one
info@relationshipone.com
CHAPTER 5:
OMG, IT’S AN IMG
PAGE 10
CHAPTER 7:
CODE LIKE A BOSS: EASY, BREEZY,
HYPERLINKS
PAGE 16
CHAPTER 6:
CODE LIKE A BOSS: FONT-LOOSE AND
FANCY FREE
PAGE 13
CHAPTER 8:
CODE LIKE A BOSS: MAKE IT
RESPONSIVE
PAGE 18
CHAPTER 2:
FOUNDATION FOR HTML EMAIL
PAGE 03
OUTRO:
THAT’S A WRAP
PAGE 20
CHAPTER 3:
HTML TABLES FOR EMAIL
PAGE 05
INTRO:
CODE LIKE A BOSS
INTRO
table of contents
CHAPTER 1:
CODING LANGUAGE CLIFFSNOTES
PAGE 01
CHAPTER 4:
I DIG YO’ STYLE
PAGE 08

< INTRO / code like a boss />
by relationship one
info@relationshipone.com
Were you overwhelmed? Were you energized? Maybe you took one look at that
foreign language and ran the other way. Either way, no worries. We’ve got you
covered.
Whether you’re a code newbie or a seasoned pro, there’s always something you
can be learning about writing code. Luckily for us (and you), we’ve got a team of
super smart developers who can walk you through the in’s and out’s of doing front-
end development within Oracle Elqoua.
We tapped our awesome developer Kate to teach you some of her favorite tips
and tricks for making your Oracle Eloqua campaigns really shine. By the end of this
eBook, you’ll be able to tackle even the most complex HTML/CSS tasks. Follow
this handy guide and you too can learn to Code Like a Boss! Let’s get started…take
it away, Kate. />
Kate Schlagel
Front End Developer | Relationship One
Do you remember
the rst time you
looked at a chunk
of code?
Code
Like a
Boss

< 01 / code like a boss />
by relationship one
info@relationshipone.com
Code
Like a
Boss
CHAPTER 1:
CODING LANGUAGE CLIFFSNOTES
Can you keep a secret?
Lean in. It’s pretty juicy. Like many developers, I started
out in a non-related field. Sure, some developers get on
the fast track—hacking and coding in high school, then
going to technical or four-year colleges for degrees in
computer science or web development. Me? I took a
roundabout way and started with a bachelor’s degree in
English.
During one particularly stressful semester, I was slogging
through some classic German literature, and nothing was
clicking. The paper deadline was tight, I was overwhelmed
and I got desperate. In a
moment of weakness, I did the
unthinkable: I reached for the
CliffsNotes. *Gasp!* I know.
Not my proudest moment.
But, we’ve all been there,
right? *Ahem*…RIGHT?
(Okay, just lie and say you
have. It’ll make me feel better.)
If you’re a marketer and have
ever worked with emails,
forms or landing pages,
you’ve probably had some exposure to HTML, CSS,
maybe even JavaScript. And in that time, you’ve most
likely had moments of desperation—where something’s
not working and you don’t know how to fix it. At some
point, you’ve probably felt overwhelmed, confused or
helpless. Don’t sweat it!
At Relationship One, I work with the industry’s smartest
marketers, and have learned about some of their common
coding needs and pain points.
But, before we open the floodgates, we need a
foundational understanding of each language. Now,
there’s a lot of ground to cover here, but you’re busy. You
don’t have time for a lengthy, deep-dive approach. This
is the “CliffsNotes” version, baby! And you don’t have to
feel bad about it.
/>
HTML: HyperText Markup Language
HTML is composed of a series of markup tags, and each
tag describes a different type of content. For instance,
there are tags for paragraphs, headers, tables, images,
links, etc. To use an analogy, building an email or landing
page is sort of like building a house. Now, I don’t know
much about building houses, but I do know that it’s
important to start with a good foundation. The same
goes for your email or landing page. Think of HTML as
your house structure: the foundation,
studs, beams, joists, etc. Your house can’t
stand without these elements, and they
are essential to a solid structure. HTML is
a set of building blocks that defines what
elements are going to be in your email or
landing page.
CSS: Cascading Style Sheets
Our house is framed up with a foundation,
walls and a roof. It’s structurally sound, but
it’s not much to look at. Enter CSS. We
use CSS to customize our layout and add
style to our elements. In our house analogy, CSS would
be the paint color, type of siding, carpet type/color, and
flooring -- things that create the look and feel of your
house. For emails and landing pages, you can use CSS to
change the page layout, add colors, format text, create
responsiveness (for tablet/mobile), add animation, and
more.
JS: JavaScript
Our house is looking good! There’s paint on the walls,
carpeted floors, trim around the windows, etc. But
how should our house function? How are we going to
interact with our house? This is where JavaScript comes
html css js

< 02 / code like a boss />
by relationship one
info@relationshipone.com
in. JavaScript is a client-side (read by an individual’s
browser) scripting language that adds functionality and
interactivity to your landing page. (Note: JavaScript is not
used in email because email clients can’t interpret it.)
Some people confuse JavaScript with Java. They are not
the same thing. Java is a completely separate server-side
programming language. We won’t be covering it in this
eBook. If we continue with our analogy, JavaScript would
be the plumbing, electrical, and gas.
These are the things that make your static house into a
fully functioning home. On a landing page, you can use
JavaScript for hundreds of things, including submitting
and validating forms, hiding elements, and creating
animation.
jQuery
While we’re on the subject of JavaScript, let’s take a quick
detour and cover another common term you’ve probably
heard: jQuery. jQuery is what’s called a JavaScript library.
JavaScript is a robust language with lots of functionality,
but it’s not always the most efficient. Libraries take pieces
of JavaScript functionality and condense them into easy,
usable chunks of code that help streamline your code
and work faster. Neat, right?
jQuery is a very popular JavaScript library that helps
developers write less and do more. Others include
MooTools, Prototype, Yui and Dojo.
Plugins
Okay, back to our house. If JavaScript is like the electrical,
gas and plumbing, a plugin would be like an appliance
that runs on these systems. JavaScript plugins are
packaged chunks of code that you can use to do a few
specific things. For example, take a dishwasher. If you
have dirty dishes, you could clean them the old-fashioned
way (fill a sink with hot water, add soap, wash them all
by hand, rinse, dry, repeat), OR you could leverage a
dishwasher to do all those things for you.
Just like a dishwasher, plugins execute specific pieces of
functionality so developers don’t have to reinvent the
wheel every time they want to validate a form or create
a drop-down effect on a navigation bar. Plugins help
streamline the development process and can make your
code more efficient. You can use a plugin for anything
you would normally do with JavaScript, but it’s usually a
faster, more efficient way of getting to the same place.
There you have it! Hopefully now, when you’re
“Googling” for a code fix or working with a developer,
you’ll see/hear references to these coding languages
and feel more comfortable with implementing a solution.
CHAPTER 1:
CODING LANGUAGE CLIFFSNOTES - CONT:
plugins

< 03 / code like a boss />
by relationship one
info@relationshipone.com
Code
Like a
Boss
CHAPTER 2:
FOUNDATION FOR HTML EMAIL
Sticking with our house
analogy,
HTML is like the foundation that your email/landing page
stands on. We can’t build anything without it, so this is
where our journey begins.
A marketing genius like you has probably modified and/
or created an email. Sometimes, especially when emails
break, you’re forced to abandon the WYSIWYG editor
and si through the actual code for answers. If you’re
not well versed in HTML, it can be a little intimidating
to modify code. It’s especially stressful when those
modifications break the email even further and you don’t
know why. We’ve all been there.
So, now let’s focus on HTML basics, particularly for email.
We’ll start at the very beginning (a very good place to
start) and walk through the initial setup for starting an
email to get you familiar with some basic HTML terms and
concepts. It’s like we’re pouring the foundation on which
we’ll build everything else. Ready?
Let’s go! To start, let’s take a look at an example of an
empty HTML email that has no content. This is the bare
framework that you’ll want to use for every email.
CODE
<!DOCTYPE html PUBLIC “-//W3C//DTD HTML
4.01 Transitional//EN” “http://www.
w3.org/TR/html4/loose.dtd”>
<html >>
<head>
<meta name=”viewport” content=”width=de-
vice-width;initial-scale=1.0; user-scal-
able=1;”>
<meta http-equiv=”Content-Type” con-
tent=”text/html; charset=UTF-8”>
<title>Code Like a Boss: Foundation for
HTML Email</title>
</head>
<body>
</body>
</html>
Every HTML document (including emails) begins with a
<!DOCTYPE> declaration. The <!DOCTYPE> basically
tells the browser or email client which version of HTML
you plan to use. There’s some debate over the best
version for email. Campaign Monitor has a great discus-
sion here, but for our purposes, you can use XHTML 1.0
Transitional (as shown above) or HTML5, which looks
like this: <!DOCTYPE html>
Aer the <!DOCTYPE> declaration, we have our
opening HTML tag, which simply tells the browser/
email client that this is an HTML document. This might
be a good time to talk about tags. Think of an HTML
element (table, header, paragraph, link etc.) as a box or
container. Most elements (with a few exceptions) have
an opening (<>) and closing (</>) tag, which marks its
beginning and end. Everything between those tags is
“inside” that element or container. Notice the closing
HTML tag (</html>) at the very bottom of our frame-
work. Everything (besides our <!DOCTYPE> decla-
ration) is contained within our HTML element. It’s the
largest box that holds everything HTML-related. Make
sense? Cool. Let’s move on.

< 04 / code like a boss />
by relationship one
info@relationshipone.com
CHAPTER 2:
FOUNDATION FOR HTML EMAIL - CONT:
The first thing inside our HTML element is the head. The
head contains information about our HTML document,
including meta tags and the title. Meta tags provide
metadata about our HTML page. It’s data about data.
These tags will not be visible in your email, but your
browser/email client can read them. The ones used
above help control character sets and allow the email
to scale across multiple devices. You can do a lot with
meta tags, so if you want to do more reading, here are a
couple resources to get you started:
Ⱥ http://www.w3schools.com/tags/tag_meta.asp
Ⱥ https://litmus.com/community/discussions/39-
explanation-of-doctype-html-attributes-meta-tags-in-
email
The title also goes inside our head. As you’d expect, this
is where we can assign a title to our email (or landing
page). If you’re including a link to view an “online version”
of your email, be sure to include this when you build, as it
will show up in the browser tab, like so:
CSS styles can also go in the document head and are CSS
styles can also go in the document head and are marked
with start and end <style> tags, but that’s a lesson for
another chapter. I’ll dive into CSS in a future chapter, so
keep reading!
Aer the head (marked by a closing head tag </head>)
comes our body. This is where all of our email content
goes, and where we’ll do the majority of our building
and editing. That’s it! You have a solid foundation to add
HTML tables.
Onward and upward.
-----

< 05 / code like a boss />
by relationship one
info@relationshipone.com
Code
Like a
Boss
CHAPTER 3:
HTML TABLES FOR EMAIL
Now that we have our
foundation in place,
it’s time to start adding content. As I mentioned in the
last section, all of our content is going in the body,
which begins with an opening body tag
(<body>) and
is placed right after the closing head tag
(</head>).
There are several ways to go about building an email,
but the most established approach is with tables.
In HTML, there is a table tag
(<table></table>) that
creates a table container. Within every table, there is
at least one table row
(<tr></tr>) and one table data,
like a table cell
(<td></td>). You can’t have a table
without these three components. There are other table-
related tags (header, footer and body), but these are
less common in email development. So, let’s dig right
into the code, shall we? Here’s what a basic HTML
table looks like. (I’ve included the opening and closing
body tags for point of reference).
CODE
<body>
<table>
<tr>
<td></td>
</tr>
</table>
</body>
Notice how the elements are nested. We have a
table that contains one table row, and that table row
contains one table cell. Each element begins with an
opening tag and has a closing tag to match. Make
sense? Cool.
Before we move on, let’s talk about attributes. In
HTML, attributes are properties you can set on a par-
ticular element that help with appearance, positioning
or functionality. Many attributes are common across
multiple elements, but some are unique to a specific
element. For example, “width” is an attribute that you
can set on an image or table, but not on links. Tables
have their own attributes, including, but not limited to:
■ Align: specifies the alignment of a table according to the
surrounding text (options: le, right or center)
■ Cellspacing: space between cells (number of pixels)
■ Cellpadding: space between the cell wall and cell content
(number of pixels)
■ Border: specifies if table has a border or not (options: 1
or 0)
■ Width: width of the table (number of pixels)
For a full list see:
http://www.w3schools.com/tags/tag_table.asp.
Let’s give our table some attributes to help further define
it. We’ll set cellspacing and cellpadding to zero to
eliminate any unwanted spacing in our layout. During the
building process, I like to add borders to my tables so I
can see the layout.
When I’m done, I set all borders back to zero to remove
them. Let’s also set the width of the table to 640 pixels
(standard email width) and center it using the align
attribute. Lastly, we’ll place some filler text inside our
table cell, so you can see it better.
-----

< 06 / code like a boss />
by relationship one
info@relationshipone.com
CHAPTER 3:
HTML TABLES FOR EMAIL- CONT:
Attributes always go in the element’s opening tag. Begin
with the name of the attribute, followed by “=” and then
quotes. The value or option you want to set goes inside
the quotes. Here’s what our table looks like with our
attributes set:
CODE
<body>
<table cellspacing=”0” cellpadding=”0” width=”640”
align=”center” border=”1”>
<tr>
<td>Hi! I’m a table with one cell.</td>
</tr>
And here’s what that table looks like in a browser or email
client:
Congratulations! It’s a beautiful table. This is typically
where emails begin—with one centered table at the
desired width. I like to call this my main container or
wrapper. We can build the rest of our tables inside this
wrapper so our content remains centered and at the
desired width.
Let’s say we want to create a header with a space for a
logo at the le and another space for an image on the
right. Inside our wrapper, we’ll want to add another
table. This time, the table will have two table cells: one
for the logo, and one for the image.
CODE
<body>
<table cellpadding=”0” cellspacing=”0” width=”640”
align=”center” border=”1”>
<tr>
<td>
<table cellpadding=”0” cellspacing=”0” width=”640”
align=”left” border=”1”>
<tr>
<td>Logo goes here.<td>
<td>Image goes here.</td>
</tr>
</table>
</td>
</tr>
</table>
</body>
And here’s what it looks like:
Alternatively, instead of one table with two table cells, we
can use two tables, each with one table cell. Then we can
leverage the align and width attributes to place the tables
next to each other.
CODE
<body>
<table cellpadding=”0” cellspacing=”0” width=”640”
align=”center” border=”1”>
<tr>
<td>
<table cellpadding=”0” cellspacing=”0” width=”318”
align=”left” border=”1”>
<tr>
<td>Logo goes here.</td>
</tr>
</table>
<table cellpadding=”0” cellspacing=”0” width=”318”
align=”left” border=”1”>
<tr>
<td>Image goes here.</td>
</tr>
</table>
</td>
</tr>
</table>
</body>
In this case, we gave each inner table a width of 318
pixels (640 divided by 2, minus the 1-pixel border
on each side) and set the align attribute to le. Using
align=”le” ensures that our tables display side-by-side,
assuming the total width of the inner tables is less than
the container table. Without this, the tables stack on top
of each other. As you can see, the result is the same:
Note: Using this method is great for responsive emails that
require elements to stack for mobile, but that’s a lesson for
another chapter.
Hi! I’m a table with one cell.
Logo goes here. Image goes here.
Logo goes here. Image goes here.

< 07 / code like a boss />
by relationship one
info@relationshipone.com
CHAPTER 3:
HTML TABLES FOR EMAIL- CONT:
If you wanted to add content below, you can either add a
new table row like so:
CODE
<body>
<table cellpadding=”0” cellspacing=”0” width=”640”
align=”center” border=”1”>
<tr>
<td>
<table cellpadding=”0” cellspacing=”0” width=”318”
align=”left” border=”1”>
<tr>
<td>This is where the logo goes.</td>
</tr>
</table>
<table cellpadding=”0” cellspacing=”0” width=”318”
align=”left” border=”1”>
<tr>
<td>This is where the image goes.</td>
</tr>
</table>
</td>
</tr>
<tr>
<td>Here is some more content in a new table row.</
td>
</tr>
</table>
</body>
Or start another table:
CODE
<body>
<table cellpadding=”0” cellspacing=”0” width=”640”
align=”center” border=”1”>
<tr>
<td>
<table cellpadding=”0” cellspacing=”0” width=”318”
align=”left” border=”1”>
<tr>
<td>This is where the logo goes.</td>
</tr>
</table>
<table cellpadding=”0” cellspacing=”0” width=”318”
align=”left” border=”1”>
<tr>
<td>This is where the image goes.</td>
</tr>
</table>
<table cellpadding=”0” cellspacing=”0” width=”640”
align=”left” border=”1”>
<tr>
<td>Here is some more content in a new full-width
table.</td>
</tr>
</table>
</td>
</tr>
</table>
</body>
Get the idea? Basically, most email layouts are just
combinations of nested tables with various numbers
of rows and table cells. Yes, it can get hairy at times,
especially with all the nested elements, but the more you
read and edit code, the more it’ll start to make sense. I
promise.
That completes the lesson. Nice work, so far! Keep
playing around with these table tags and attributes and
see what types of layouts you can create. If you get stuck,
here are some handy resources that can help you out:
Ⱥ http://www.w3schools.com/html/html_tables.asp
Ⱥ http://templates.mailchimp.com/development/
html/
-----
■
Logo goes here. Image goes here.
Here is some more content in a new table row.
Logo goes here. Image goes here.
Here is some more content in a full width table
Logo goes here. Image goes here.

< 08 / code like a boss />
by relationship one
info@relationshipone.com
Code
Like a
Boss
CHAPTER 4:
I DIG YO’ STYLE
In the last two sections,
we’ve used some HTML best practices to set up our email
foundation and layout a couple basic tables. Now, we’re
shiing from structure to style in our first lesson on CSS.
Let’s do it! In basic terms, CSS (Cascading Style Sheets) is
a style sheet language that describes the presentation of
an HTML document. CSS includes hundreds of stylistic
properties (color, shape, size, placement, etc.) that help
turn raw HTML like this (look familiar?)… …
into something more user-friendly, like this.
Before we learn how to apply CSS, we first need to know
where. There are three ways to insert styles into your
document. Let’s review them, shall we?
External
External style sheets are separate documents that contain
only CSS. You can recognize them by their .css extension.
To include an external CSS file in your HTML, use a link
tag (<link></link>) in the head of your document, like
this:
code
<head>
<link rel=”stylesheet” type=”text/css” href=”path/
to/mystylesheet.css”>
</head>
In this case, we are linking to a CSS file called
“mystylesheet.css”. If we were to open this file, it would
contain only pure CSS, like this:
code
body {
background-color: lightblue;
}
h1 {
color: navy;
margin-left: 20px;
}
External style sheets are best used for larger web projects
that contain multiple HTML pages. For instance, let’s say
we’re building a website that has 50 different pages, and
they all use the same CSS. If that CSS lives locally on each
page, one simple style update would mean updating all
50 pages individually, which could lead to errors and
inconsistencies. But, if we use an external style sheet and
link it to all the pages, any modification to that style sheet
would update all the pages that include it. It’s a great way
to keep your code organized and reduce effort and risk.
Note: Since most webmail clients block links to external styles
sheets, this is not a good option for email.
Logo goes here.
Here is some more content in a new table row.
Logo goes here.
Here is some more content in a new full-width table.

< 09 / code like a boss />
by relationship one
info@relationshipone.com
CHAPTER 4:
I DIG YO’ STYLE- CONT:
Internal
Internal style sheets are found directly on the HTML
pages they correspond to. They’re typically used for
email, landing pages or special pages within a larger
web project that require unique styling. Internal styles are
found in the head of your HTML page inside a set of style
tags (<style></style>), like this:
code
<head>
<style>
body {
background-color: blue;
}
h1 {
color: orange;
margin-le: 40px;
}
</style>
</head>
Anything between the style tags is specific to the HTML
page on which it’s placed. If you find you’re using the same
styles across multiple pages, an external style sheet is the
way to go. Internal style sheets can be used for email, but
sparingly and with caution. Some email/webmail clients
(looking at you, Gmail) use preprocessors that strip out
the internal CSS for security purposes, which can break
your email. No fun.
Before we review the final CSS placement option, let’s
take a closer look at the basic syntax, just to get you
familiar with how it works.
The syntax is the same for both external and internal style
sheets, and looks like this (thanks, W3schools):
With an external or internal style sheet, you need to use
a selector, which tells the browser which element you
want to style. In this case, we’re targeting all of the h1
headers (Side Info Nugget: headers come in different
sizes ranging from 1-6. 1 is the largest, 6 is the smallest).
Once we’ve selected our element, we have to state
which property we want to set and then set the value for
that property.
In this example, we’re setting the color property to the
value blue and the font-size property to the value of 12
pixels. Make sense? Awesome. Let’s move on to the final
(and most email-appropriate) CSS placement option.
Inline
Inline styles are placed directly in your HTML tags and
affect only that specific element. This placement option
(in tandem with limited internal styles) is used primarily
for email development, because it is accepted across
the majority of email clients. The syntax for inline CSS
is slightly different from the external/internal examples
above. Here’s an example:
code
<h1 style=”color: blue; font-size: 12px;”>I’m the
largest header.</h1>
We don’t need a selector because we’re injecting the
style directly into the element we want to change. In this
case, we’re only targeting this specific h1 header, not all
of them.
Next, we declare the style attribute and set it equal to
any number of declarations. The declarations remain the
same, always including property/value pairs separated
by a colon and delimited with a semi-colon.
There are hundreds of CSS properties to choose from,
and they all work together to adjust the way elements
appear on the screen. W3schools has a great list to
get you started. Have fun experimenting with these
properties! It’s a great way to get familiar with basic CSS.
-----

< 10 / code like a boss />
by relationship one
info@relationshipone.com
Code
Like a
Boss
CHAPTER 5:
OMG, IT’S AN IMG
We’ve set up our basic
HTML framework with some nested tables and used CSS
to make it more presentable and user friendly. Now, the
fun part: content! For demo purposes, let’s say we have
a couple simple tables with a logo and a little content,
like this:
And we want to add an image below our content, so it
looks like this:
How do we do that?
First, we start with an image tag: <img/>. It’s important
to note that an image tag is self-closing, meaning it
doesn’t require a closing tag (</img>) like other tags do.
In some versions of HTML (like HTML 5), the ending slash
is optional, but for our purposes, we’ll keep it.
When I add an image tag to our table, we get something
that looks like this:
Wait, that’s not right. We just added an image. Shouldn’t
we see something? We did add an image tag, but that’s
not enough. Our browsers/email clients can’t read
minds (probably for the best), so we need to give them
information on where the image is located. We do this by
setting our source attribute.
The source (“src”) attribute tells the browser/email client
where to look for an image. If you’re building an email
in Oracle Eloqua, the value of this attribute will be a URL
that points to an image in your instance. (To find this URL,
double click on any image in your library and select the
full URL).
Logo goes here.
A little content.
Logo goes here.
A little content.
Logo goes here.
A little content.

< 11 / code like a boss />
by relationship one
info@relationshipone.com
CHAPTER 5:
OMG, IT’S AN IMG- CONT:
A4
If you are not working in Eloqua, simply use a URL that
directs to wherever your image is stored.
Here’s an example:
<img src=”http://img.en25.com/EloquaImages/
clients/RelationshipOneE10Sandbox/
%7b5dd00ff2-0782-4d72-97e9-130318521614%7d_
marketing.jpg”/>
Troubleshooting tip: If you add your source attribute and
URL and you see something like this…
…it’s most likely an indication that something is wrong
with your URL. Make sure to double check that you’re
using the correct path and file extension.
Now that we have a valid image source, the browser/
email client can find it and display it, like so:
Woohoo! Feels good, doesn’t it? Even though our image
is rendering, it’s best practice to include some alternate
text along with it. For the web, this is extremely useful
for blind/low-vision audiences who might be using a
screen reader. It also helps search engine bots index your
pages. Who doesn’t want that? For email, alternative text
is an absolute must, as this will be the text that shows up
if a user has images turned off. To set this alternate text,
we’ll use the “alt” attribute, like so:
<img src=”http://img.en25.com/EloquaImages/
clients/RelationshipOneE10Sandbox/
%7b5dd00ff2-0782-4d72-97e9-130318521614%7d_
marketing.jpg” alt=”super sweet image,
dude.”/>
Here’s how our email would look if our images were
turned off:
If you want to get fancy, some webmail clients like
Outlook.com and Office365 support styled alt text. To
add style to your text, use inline CSS, like this:
<img src=”http://img.en25.com/EloquaImages/
clients/RelationshipOneE10Sandbox/
%7b5dd00ff2-0782-4d72-97e9-130318521614%7d_
marketing.jpg” alt=”super sweet image,
dude.” style=”color: green; font-family: Helvetica; font-
size:30px;”/>
Logo goes here.
A little content.
Logo goes here.
A little content.
super sweet image dude.
Logo goes here.
A little content.

< 12 / code like a boss />
by relationship one
info@relationshipone.com
CHAPTER 5:
OMG, IT’S AN IMG- CONT:
The result:
Get the idea? There are other attributes such as width,
height, align, etc. (see full list here) that you can use on
your image tags, but “src” and “alt” are the two most
important.
-----
Logo goes here.
A little content.
super sweet image, dude.

< 13 / code like a boss />
by relationship one
info@relationshipone.com
Code
Like a
Boss
CHAPTER 6:
CODE LIKE A BOSS: FONT-LOOSE
AND FANCY FREE
We’ve just added a
lovely image to our email. Nice work! But, we need some
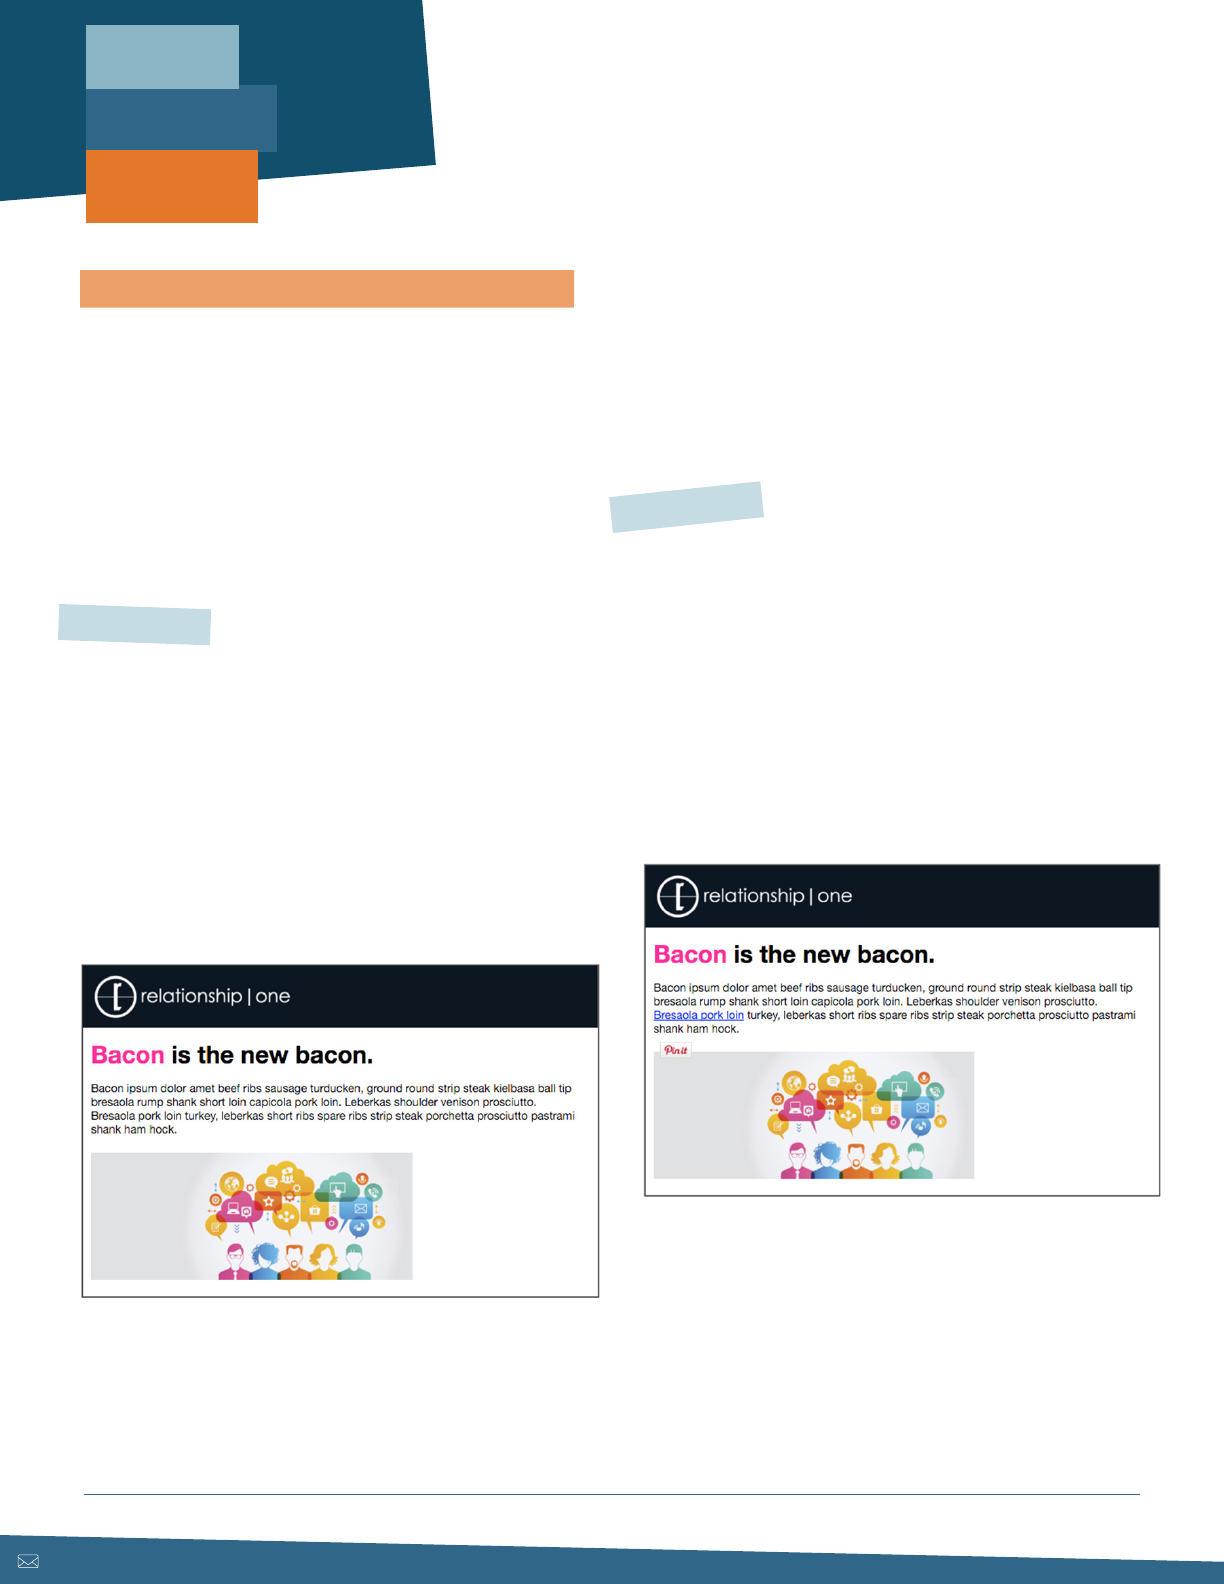
nice looking copy, right? Duh. For this lesson, we’ll keep
it simple with just a heading and some body copy.
I’ll walk you through the basic setup in HTML, and then
we’ll cover some specific CSS properties to help you
customize the style.
At the end, it’ll look something like this:
Side note: Is your standard lorem ipsum missing something? Is
that something bacon? Indulge, my friend: http://baconipsum.
com/.
First thing’s first; let’s add some copy, starting with the
heading. Headings are defined in HTML with specific
tags that denote the size. The largest heading tag is an
h1, which looks like this: <h1></h1>. As the numbers
increase, the size of the heading decreases. The smallest
heading is an h6: <h6></h6>. Typically, h1’s are
reserved for major headlines or page titles. The smaller
ones (h5’s and h6’s) are less common, but appropriate in
certain cases, depending on what you’re building. In this
case, let’s use an h2.
Within the table cell (<td></td>) that contains our
image, we’ll add an opening and closing h2 tag and put
our heading copy inside, like this:
code
<td style=”font-family: ‘Helvetica Neue’,
Helvetica, Arial, sans-serif; font-size: 14px;
line-height: 17px; padding-bottom: 20px; padding-
left: 10px; padding-right: 20px;”>
<h2>Bacon is the new bacon.</h2>
<img src=”marketing.jpg” width=”400” style=”display:
block; padding-top: 20px;”
alt=”super sweet image, dude.”/>
</td>
Next, we’ll add some body copy below it.
code
<td style=”font-family: ‘Helvetica Neue’,
Helvetica, Arial, sans-serif; font-size: 14px;
line-height: 17px; padding-bottom: 20px; padding-
left: 10px; padding-right: 20px;”>
<h2>Bacon is the new bacon.</h2>
Bacon ipsum dolor amet beef ribs sausage turducken,
ground round strip steak kielbasa ball tip bresaola
rump
shank short loin capicola pork loin. Leberkas
shoulder venison prosciutto. Bresaola pork loin
turkey,
leberkas short ribs spare ribs strip steak porchetta
prosciutto pastrami shank ham hock.
<img src=”marketing.jpg” width=”400” style=”display:
block; padding-top: 20px;”
alt=”super sweet image, dude.”/>
</td>
Side note: For web development, we’d typically wrap this body
copy in a paragraph tag (<p></p>), but for email, it’s not as
important since it’s already enclosed within a table cell.

< 14 / code like a boss />
by relationship one
info@relationshipone.com
CHAPTER 6:
CODE LIKE A BOSS: FONT-LOOSE
AND FANCY FREE
Okay, sweet. We have our copy in place. Let’s see what
it looks like.
Not bad, but it needs some style. Let’s use CSS to adjust
the font, sizing, spacing and color.
Font Type
If you don’t specify a font, most browsers and email clients
default to the lovely Times New Roman. Nothing against
Times, but we can do better. Because we’re working with
an email, it’s best to stick with web-safe fonts, as they’re
the most reliable across all platforms. However, if you’re
interested in experimenting with custom fonts, Google
Fonts is a good option.
Here are some resources to get you started:
Ⱥ Litmus: https://litmus.com/blog/typography-tips-
for-email-designers
Ⱥ MailChimp: http://templates.mailchimp.com/
design/typography/
In our table cell, we’ll add the “font-family” property to
our style attribute and set the value to “Helvetica”, like
this:
code
<td style=”font-family: ‘Helvetica’; padding-
bottom: 20px; padding-left: 10px; padding-right:
20px;”>
A couple things to note:
1. Since we’re applying this style to the containing table
cell, all copy within that table cell will be affected,
which means both our heading and body copy.
2. Notice the quotes around “Helvetica.” When
referencing a specific font name (as opposed to
something generic like serif or sans-serif), use quotes.
But what if our browser or email client can’t render
Helvetica? If we le things as is, the font would default
back to Times New Roman. No good. To prevent that,
we’ll implement what’s called a “font stack”. This is a
comma-delimited list (in order of importance) that defines
our primary and backup fonts. So, if Helvetica isn’t
available, let’s roll back to Arial, and if Arial isn’t available,
then we’ll default to a basic sans serif.
code
<td style=”font-family: ‘Helvetica’, ‘Arial’,
sans-serif; padding-bottom: 20px;
padding-left: 10px; padding-right: 20px;”>
There are hundreds of font stacks to choose from, but
here are two basic sets to get you started:
■ Sans-serif: Helvetica, Arial, Verdana, Trebuchet MS
■ Serif: Georgia, Times New Roman, Courier

< 15 / code like a boss />
by relationship one
info@relationshipone.com
CHAPTER 6:
CODE LIKE A BOSS: FONT-LOOSE
AND FANCY FREE
Meet the span tag (<span></span>). A span tag is like
a wrapper that allows us to target a specific piece of an
html element without affecting the entire thing. We’ll
wrap “Bacon” in a span tag and add CSS to it to change
the color.
code
<td style=”font-family: ‘Helvetica Neue’,
Helvetica, Arial, sans-serif; font-size: 14px;
padding-bottom: 20px; padding-left: 10px; padding-
right: 20px;”>
<h2 style=”font-size: 30px;”><span style=”color:
deeppink;”>Bacon</span> is the new bacon.</h2>
In this case, the font-size property targets the entire
heading, whereas the color property is localized to
whatever is inside our span tag. And the result:
Dang. That is one delicious email.
There are tons of CSS properties you can use to customize
your copy, but, hopefully, these examples have given you
a good starting point. For more guidance, w3schools
has a full list with some solid examples.
-----
< 16 / code like a boss />
by relationship one
info@relationshipone.com
Code
Like a
Boss
CHAPTER 7:
CODE LIKE A BOSS: EASY, BREEZY,
HYPERLINKS
The last section covered
some best practices around adding copy to our email.
Next, we’re going to add a link in three easy, breezy
steps. Ready? Of course you are.
Step 1: Tag it
Like most HTML elements, links use a special tag called
the anchor tag, which looks like this: <a></a>. To create
a link, start by placing the opening and closing anchor
tags around your call-to-action text, like so:
code
Bacon ipsum dolor amet beef ribs sausage turducken,
ground round strip steak kielbasa ball tip
bresaola rump shank short loin capicola pork
loin. Leberkas shoulder venison prosciutto.
<a>Bresaola pork loin</a> turkey, leberkas short
ribs spare ribs strip steak porchetta prosciutto
pastrami shank ham hock.
If you view our email in a browser, you’ll notice that
nothing has changed. The text looks the same and it
doesn’t do anything when you click on it.
Step 1: Tag it
To make our link actually look and function like a link, we
need to add an attribute that tells the browser where to
send the user if the link is clicked. This is called the “href”
(short for “hypertext reference”) attribute, and it looks
like this: <a href=””></a>. Just like any other attribute,
it follows the same conventions we discussed in the
previous HTML Tables post. As you’ve probably already
guessed, your URL goes between the quotes, like so:
code
Bacon ipsum dolor amet beef ribs sausage turducken,
ground round strip steak kielbasa ball tip
bresaola rump shank short loin capicola pork loin.
Leberkas shoulder venison prosciutto.
<a href=”http://www.google.com”>Bresaola pork
loin</a> turkey, leberkas short ribs spare ribs
strip
steak porchetta prosciutto pastrami shank ham hock.
So, now your link should be blue and underlined, and
when you click it, it should take you to Google. Nice
work.
You’ll notice that when you click the link, the URL opens
in the same window/tab, directing you away from the
page you started on. This is the default functionality of a
link, but it can be changed using the “target” attribute.
Before we dig into that, however, I should say that this is
a pretty widely debated subject in the UX/world. Some
people think it is best to empower the user to choose

< 17 / code like a boss />
by relationship one
info@relationshipone.com
CHAPTER 7:
CODE LIKE A BOSS: EASY, BREEZY,
HYPERLINKS
their own experience, while others feel it’s perfectly
expectable (and more user-friendly) to force a new tab to
open. I recommend doing some reading on the subject
before you decide. Here are a few articles to get you up
to speed.
Ⱥ https://css-tricks.com/use-target_blank/
Ⱥ http://thinksem.com/blog/should-i-open-external-
links-in-new-tab/
Ⱥ http://libux.co/links-should-open-in-the-same-
window/
If you’ve decided that you want to open your link in a new
tab, you can leverage the “target” attribute and give it a
value of “_blank”, like so:
code
Bacon ipsum dolor amet beef ribs sausage turducken,
ground round strip steak kielbasa ball tip
bresaola rump shank short loin capicola pork loin.
Leberkas shoulder venison prosciutto.
<a href=”http://www.google.com” target=”_
blank”>Bresaola pork loin</a> turkey, leberkas
short ribs spare ribs strip steak porchetta
prosciutto pastrami shank ham hock.
This is the most common value for the target attribute, but
there are a few others to choose from. See w3schools for
full documentation.
There are many other attributes you can use to add
functionality to your links, but “target” and “href” are the
main ones to focus on.
Step 3: Style it
To change your link’s font, color, size, etc., use your mad
inline CSS skills to target the link directly. If you need a
refresher, see my last post on adding copy.
For this example, we’ll make the link pink to match our
headline and remove the underline, like so:
code
Bacon ipsum dolor amet beef ribs sausage turducken,
ground round strip steak kielbasa ball tip
bresaola rump shank short loin capicola pork loin.
Leberkas shoulder venison prosciutto.
<a href=”http://www.google.com” target=”_blank”
style=”color: deeppink; text-decoration: none;”>
Bresaola pork loin</a> turkey, leberkas short ribs
spare ribs strip steak porchetta prosciutto
pastrami shank ham hock.
Hope you find it useful. Have fun adding links to your
email!
-----

< 18 / code like a boss />
by relationship one
info@relationshipone.com
Code
Like a
Boss
CHAPTER 8:
CODE LIKE A BOSS: MAKE IT
RESPONSIVE
Responsive design.
You’ve heard the term, right? You’re a marketing genius and totally in the know, so you’ve probably also heard terms
like “mobile-friendly”, “mobile-optimized” or “scalable.” But what are we really talking about here? The concept of
optimizing layouts for both desktop and mobile has been around in the web world for years. Now it has crept into the
realm of email marketing and is taking off in a big way. So what is responsive design, and should you consider it for your
next email campaign?
Break it down for me: Scalable, Fluid and Responsive
fluid Design
With fluid layouts, there is some use of code to adjust the
width of your layout, but the customization options are
limited, similar to scalable.
■ Usually limited one-column layouts
■ Content “flows” to device width, but there’s no
change in layout/content
■ Minimal use of customized code
■ Typically best suited for text-heavy layouts
Scalable Design
Jason Rodriguez at Litmus explains scalable
design (also known as mobile-friendly) as: “…
any design that works well across both desktop
and mobile without using code to adjust table or
image sizes, or display or hide content between
the two platforms.” The key phrase here is
“without using code.” A scalable design is simply
a design-focused approach that scales easily
from desktop to mobile.
■ Designed to fit both desktop and mobile
■ No special coding
■ Layout does all the work: usually one-column
with larger text and easy-to-click buttons
■ No options to shi or hide elements

< 19 / code like a boss />
by relationship one
info@relationshipone.com
CHAPTER 8:
CODE LIKE A BOSS: MAKE IT RESPONSIVE
PROS
1. Reach a wider audience
2. Provide a customized user experience
3. Increase email engagement
Bottom line: Millions of people are checking their
emails from a phone or tablet right now. Responsive
emails can help you reach them in a more meaningful
way.
know your audience -
What percentage of your email recipients are actually viewing your emails on a mobile
device? If it’s significant, a responsive email might be a good way to enhance their experience and increase
engagement.
Analyze your campaign - What percentage of your email recipients are actually viewing your emails on a
mobile device? If it’s significant, a responsive email might be a good way to enhance their experience and increase
engagement.
Identify your purpose - What is the focus of email? Are you trying to provoke users to sign up for an event, or is
the goal to inform, like a newsletter? Think about how your users will be interacting with your email. If the purpose is to
get users to click through (to sign-up or register for something) they might be more likely to do it if the email experience
is effortless. If the email contains mostly informative text with few or no calls to action, a fluid or scalable design might
be all you need.
cons
1. More time to design, build and test
2. Knowledgeable designers and developers are
needed and can be challenging to find
3. Email clients render responsive emails differently
Bottom line: Responsive emails can be time consuming
and labor intensive, and you’re not guaranteed
perfection across all platforms.
Give it to me straight: Pros and Cons
Have you ever tried to navigate a non-responsive website from your phone? I’m a fairly patient person, but zooming in
on tiny text, endless side scrolling and carefully zeroing-in on tiny buttons is enough to make me want to give up browse
elsewhere. As someone who surfs regularly from a phone, (and I don’t think I’m alone here), I’ve come to expect that
websites be easy to navigate, regardless of the device I’m using. Shouldn’t the same expectations apply for email? In
a magical, sparkly email marketing utopia, yes! But, we’re not there yet, so there are definitely some pros and cons to
consider when deciding whether or not to go responsive.
Help me decide: When and where?
In a perfect world (yes, with sparkles), email marketers would have the time and resources to make every email in every
campaign responsive. But, that’s not realistic for most marketing teams and, in many cases, isn’t necessary. If you are
thinking about going responsive, here some questions that might help you identify when and where it might be a good
choice.
< 20 / code like a boss />
by relationship one
info@relationshipone.com
Code
Like a
Boss
OUTRO:
THAT’S A WRAP
1. Plan your content and layout carefully.
What percentage of your email recipients are actually
viewing your emails on a mobile device? If it’s
significant, a responsive email might be a good way to
enhance their experience and increase engagement.
3. Consult a developer.
Templates are great, but there are many situations that
require more customizations than what they can offer.
A developer who knows about responsive emails can
offer you even greater flexibility and fine-tuning.
2. Try a template.
Eloqua offers a few responsive email templates that
can get you off to a good start. Play around and see
what you can come up with.
4. set expections & pick your battles
Responsive design is still a relatively new concept
for email, so support across all email clients and
devices varies greatly. Focus on optimizing for your
key platforms and try not to get hung up on the rest.
i'm going for it! Now what?
You want to do a responsive email? High five! Now what? Here are some tips to get you started:
That’s it. You’re ready to build. Are you going to try it out all your new tricks?
Wrapping It Up: Peace Out!
There ya go. All the tools you need to get you coding like a boss. Now that you’re fluent in “code” you can impress
everyone with your ability to work out weird formatting glitches, spice up that boring newsletter with your new-found
knowledge, or dig in and start learning more.
We love seeing our clients succeed and hopefully this eBook inspired you to dig under the covers a bit with
your email campaigns. It you’re still not sure, we are here to help. If you need support with building emails
(or anything related to Oracle Eloqua), please contact us! We love helping companies get the most out of
their marketing automation efforts.
-----

< 021 / code like a boss />
by relationship one
info@relationshipone.com
at relationship one,
we empower organizations to modernize their
marketing through strategy, technology and
data. With a core staff of experienced marketing
consultants, integration specialists, data analysts
and development gurus, we have a well-respected
track record for delivering solutions that meet our
customers’ unique business needs. OUR MISSION
IS SIMPLE – INSPIRE SUCCESS.
Visit Us at:
relationshipone.com
