
Sharon Thornton- Instructional Technology
Use Audacity to Make one long MP3 song from several songs
Purpose: Some video producing sites such as Animoto may only let you add one
song, which will not be long enough if you add a lot of pictures.
You can create one sound track with several songs or loop the same song to use
in a program like this.
This is also a way you can record a narration of your voice to play in the video with
or without your music. (In some programs, this is only way you can get narration in
your video.)
Step 1: Download the song or songs you want to use.
You can download music for your videos at Freeplay music or use Creative
Commons if you are going to post on the web
Step 2:
Open Audacity Software.
Step 3:
Click on Project>Import Audio
Step 4:
Navigate to the music you saved.
Click on the song and click Open

Sharon Thornton- Instructional Technology
Note: The example above shows music that was saved ahead of time in a folder
for student use in projects.
Now you are ready to add either the same song or another song.
Notice how your song
is not imported into
Audacity.
Step 5: Add a 2
nd
song.
Click on Project>Import Audio
Step 6: Choose your next song.
Click Open.

Sharon Thornton- Instructional Technology
Notice how your 2
nd
song comes up in a different session below. You have 2
separate songs. You will need to cut and paste the 2
nd
song next to the 1
st
song.
Step 7: Click at the beginning of the 2
nd
song
and drag your mouse to select the entire song
as shown below (its dark gray when selected)
Click on Edit in the menu bar and choose Cut.
Step 8: Click at the end of your first song. You will see a dark
black vertical line. Click on Edit>Paste

Sharon Thornton- Instructional Technology
You can add Voice Narration: You can also use a microphone and record your
voice to mix with the music for your video. You can set it to play before, during or
after your songs.
Click on the Red circle and read your
passage.
Click on the yellow square icon to stop.
Click on the blue lines to pause, press again to resume.
Click on the green arrow to play.
Highlight the selection and drag it beneath the song that you want it to play. Note:
You can add this in between your songs as well. Once you bring in all your music
and record your voice (if desired) you are now ready to export this as one MP3
file.
_________________________________________________________________
Export your Recording as an MP3 file
If you are outside the district, first download the Lame Encoder so you can export
Audacity audio files as Mp3 FILES. http://audacity.sourceforge.net/download/windows
Inside the district- machines have the Lame Encoder but you have to navigate and select
it the first time you export a file as an MP3 file.
Notice how both songs are now in the same session (row.)

Sharon Thornton- Instructional Technology
If you get this message and you have installed the Lame Encoder at home or are
at school, follow these steps:
Navigate to where you want to save your song.
Name your file.
Click Save
Click on File in the menu bar.
Select: Export as MP3…
Click Yes.
Note: you only have to do this 1 time
and that’s only if you get this
message.

Sharon Thornton- Instructional Technology
Name your recording here if you want here with more
details, but not necessary.
Click OK
Wait for the export to complete.
Now your file is saved.
Navigate to the Lame Encoder Folder.
My Computer/(C:) Local Disk /Program Files
Open the Lame Encoder folder.
Select the Lame_enc_dll file
Click Open.
Sharon Thornton- Instructional Technology
With Audacity still open, locate the MP3 file and play to make sure it turned out
like you wanted.
Meanwhile, it will return you to the recording again (which has already been exported.)
Now you can go ahead and close Audacity.
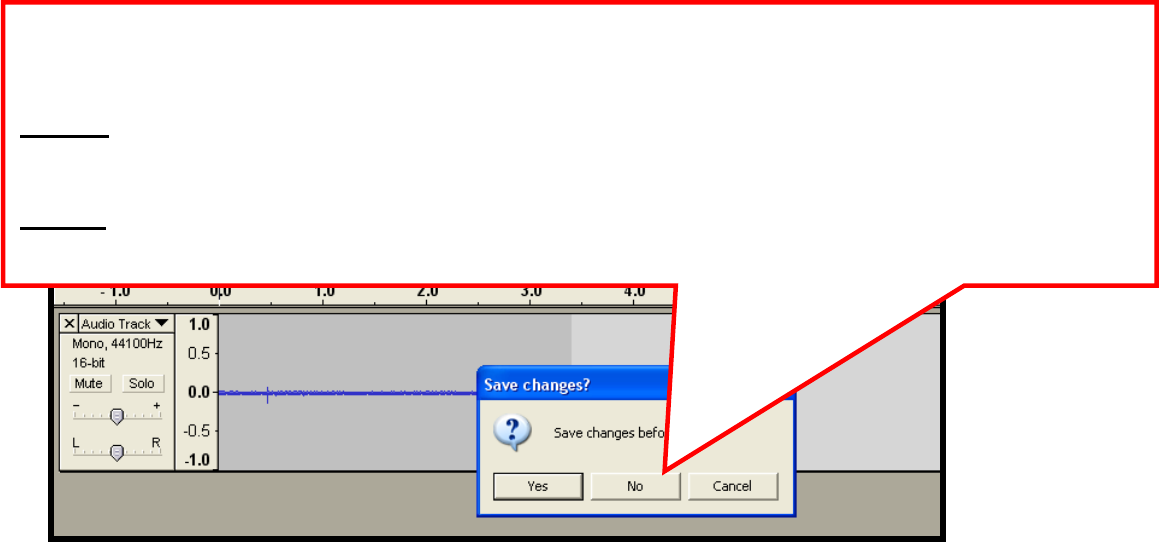
Important Note:
When you close Audacity- it will ask you if you want to save your changes before closing.
Say No- If you don’t want to save the recording as an Audacity project in case you want to go back
and edit this later.
Say Yes- If you think you might want to go back and edit this project by adding more songs or
voice.
