How to Move WordPress From Local Server to Live Site (2
Methods)
Method 1. Transfer WordPress from Local Server to Live Site Using a Migration Plugin
This method is easier and recommended for beginners. We’ll be using a WordPress migration
plugin to move WordPress from localhost to a live site.
Step 1. Install and Setup Duplicator Plugin
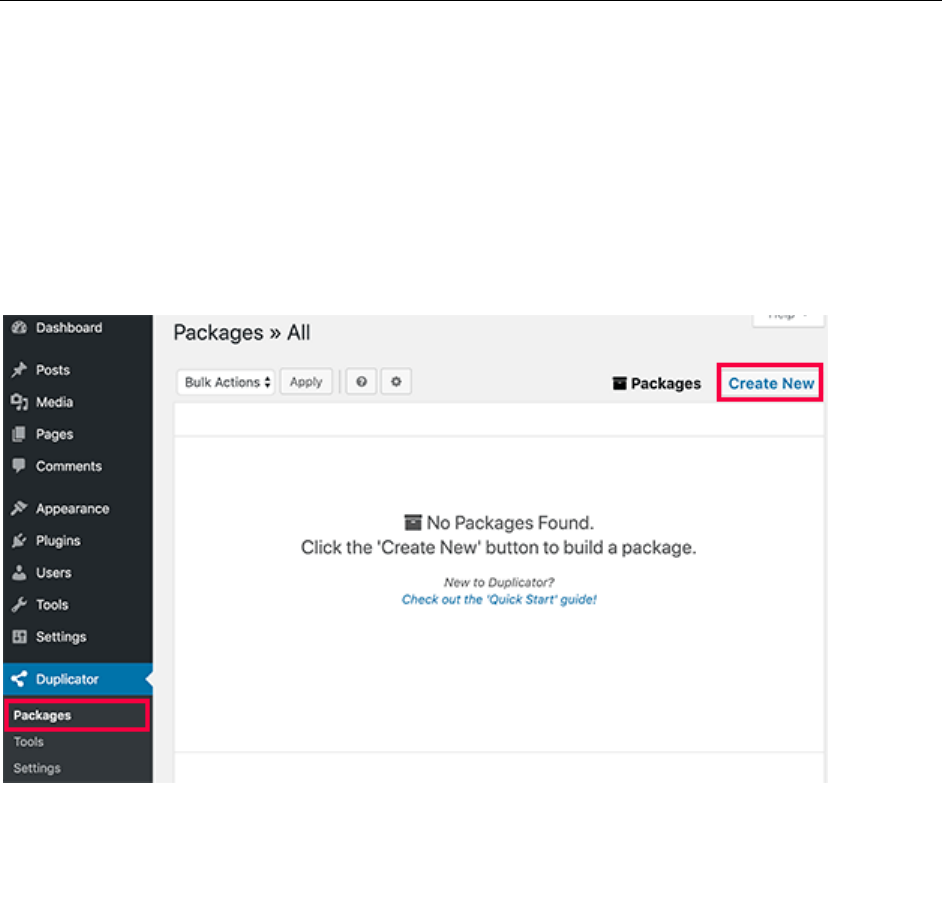
First, thing you need to do is install and activate the Duplicator plugin on your local site. Upon
activation, you need to go to Duplicator » Packages page and click on the ‘Create New’ button.
After that, click on the next button to continue.
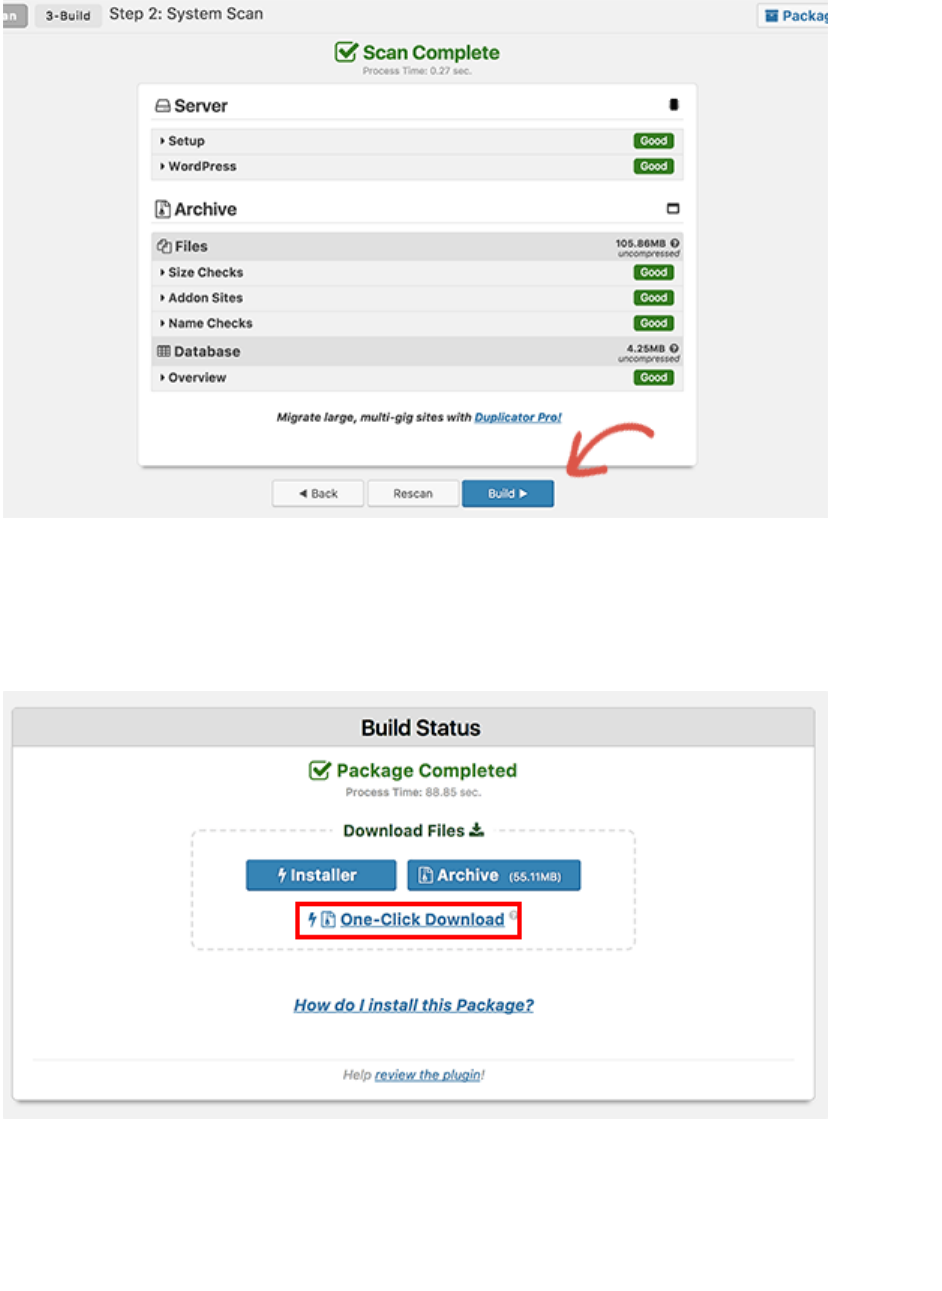
Duplicator will now run some tests to see if everything is in order. If all items are marked ‘Good’
then click on the ‘Build’ button.
This process may take a few minutes depending on the size of your website. You need to leave
this tab open until the process is complete.
Once finished, you’ll see download options for Installer and the Archive package. You need to
click on the ‘One click download’ link to download both files to your computer.
So what are these files?
Well, the archive file is a copy of your complete WordPress website. It includes all WordPress
core files as well as your images, uploads, themes, plugins, and a backup of your WordPress
database.
The installer file is a script that will automate the migration by unpacking the archive file.
Step 2. Create a Database for Your Live Site
Before you can run the installer or upload the WordPress website from localhost to your hosting
server, you will need to create a MySQL database for your live website.
If you have already created a MySQL database, then you can skip this step.
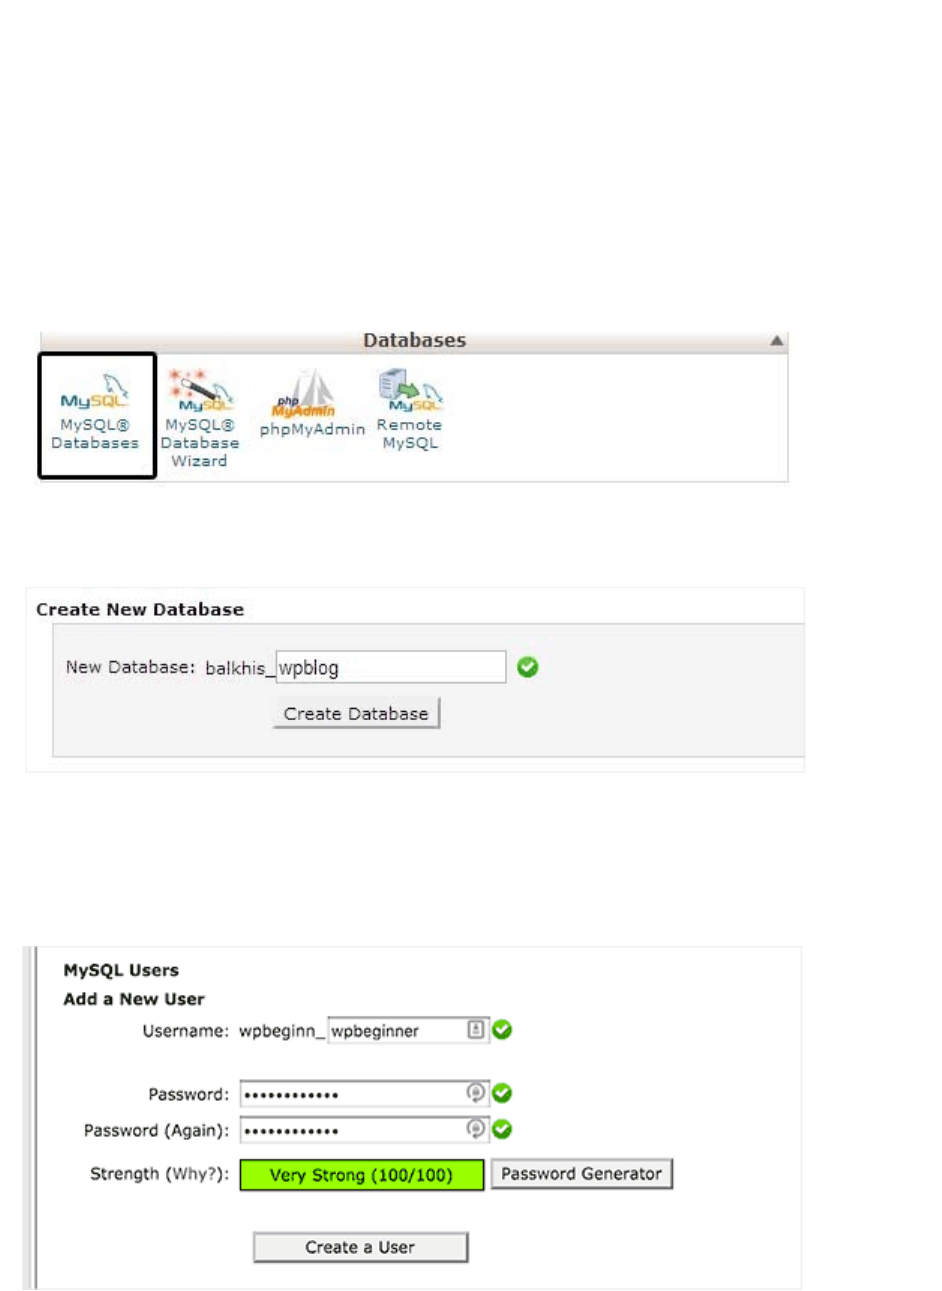
To create a database you need to visit your hosting account’s cPanel dashboard. Scroll down to
the Databases section and then click on the MySQL Databases icon.
On the next screen, you’ll see a field to create a new database. Simply provide a name for your
database and click on the ‘Create Database’ button.
cPanel will now create a new database for you. After that, you need to scroll down to the
MySQL Users section.
Next, provide a username and password for your new user and click on the ‘Create a user’
button.

The new user you just created, still does not have permission to work on the database. Let’s
change that.
Scroll down to the ‘Add User to Database’ section. Simply select the database user you created
from the dropdown menu next to the ‘User’ field, then select the database, and click on the add
button.
Your database is now ready to be used with your WordPress site. Make sure to note down the
database name, username, and password. You’ll need this information in the next step.
Step 3. Upload Files from Local Server to Live Site
Now you need to upload the archive and installer files from your local site to your hosting
account.
First, connect to your live site using an FTP client. Once connected, make sure that the root
directory of your website is completely empty.
Normally, root directory is the /home/public_html/ folder.
Some WordPress hosting companies automatically install WordPress when you sign up. If you
have WordPress files there, then you need to delete them.
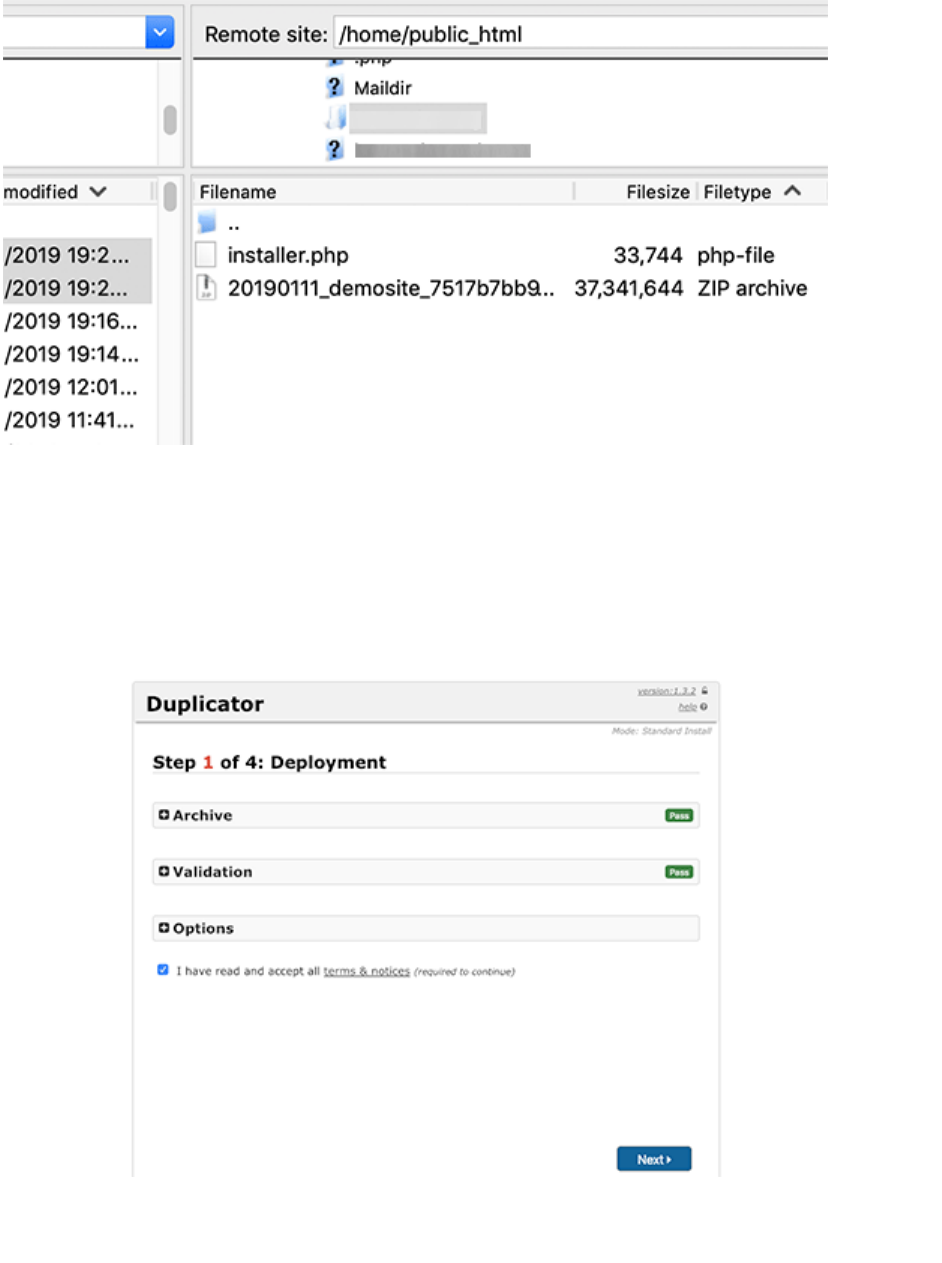
After that, you can upload the archive and installer files from Duplicator to your empty root
directory.
Step 4. Runing The Migration Script
After you have uploaded the migration files, you need to visit the following URL in your browser:
http://example.com/installer.php
Don’t forget to replace example.com with your own domain name.
This will launch the Duplicator migration wizard.
The installer will automatically scan for the archive file and run a validation test. You need to
check the terms & conditions checkbox and continue by clicking on the Next button.

On the next screen, it will ask you to enter your WordPress database information.
Your host will likely be localhost. After that, you will enter the details of the database you
created in the earlier step.
Click on the next button to continue.
Duplicator will now import your WordPress database backup from the archive into your new
database.
Next, it will ask you to update site URL or Path. You shouldn’t have to change anything since it
automatically detects the URL of your live website, and its path.
Click on the next button to continue.
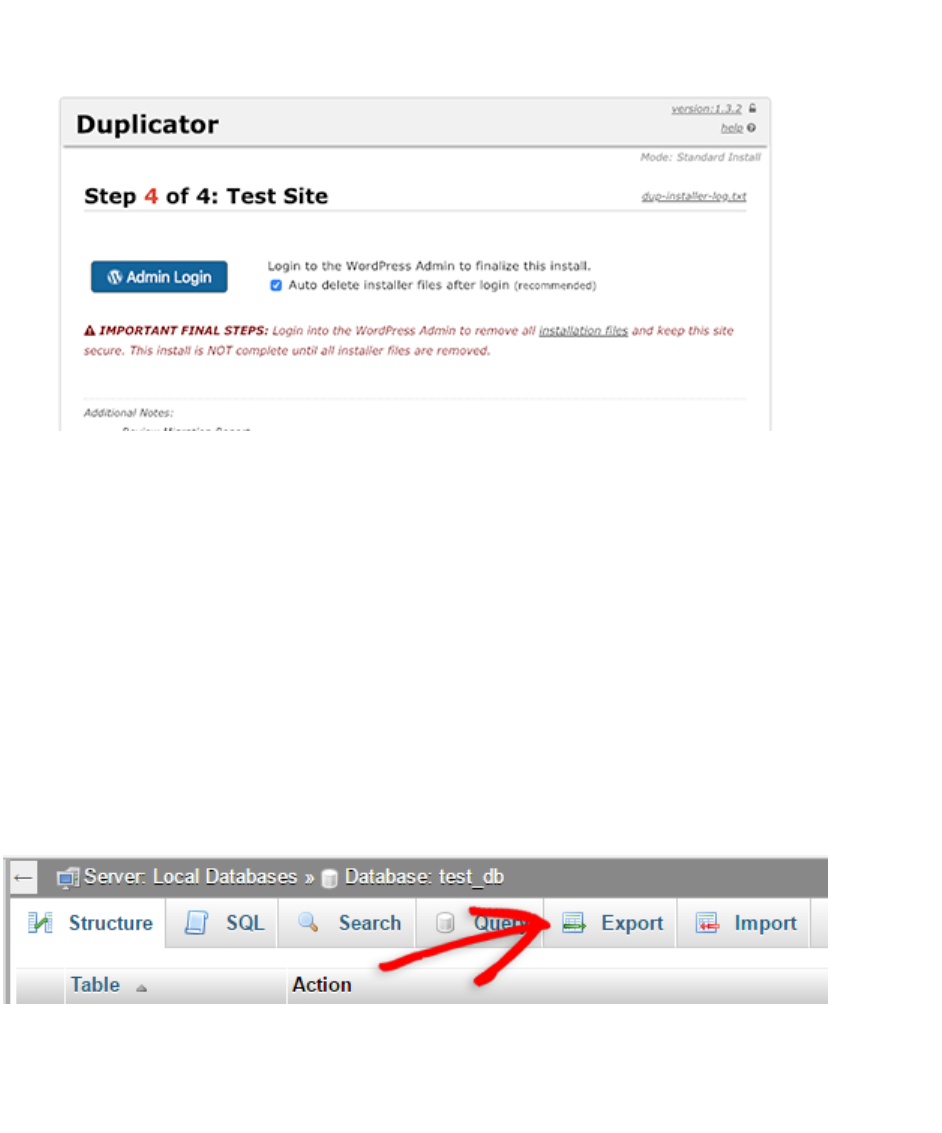
Duplicator will now finish the migration and will show you a success screen. You can now click
on the ‘Admin Login’ button to enter the WordPress admin area of your live site.
Once you login to your live site, Duplicator will automatically clean up the installation files.
That’s all, you have successfully moved WordPress from local server to your live site.
Method 2. Manually Transfer WordPress from Local Server to Live Site
In this method, we will show you how to manually move WordPress from local server to your live
site. It will come in handy if the first method doesn’t work or you prefer to do it manually.
Step 1: Export Local WordPress Database
The first thing you need to do is export your local WordPress database. We’ll be using
phpMyAdmin to do that. Simply go to http://localhost/phpmyadmin/ and click on your
WordPress database. Next, click on the Export button from the top menu bar.
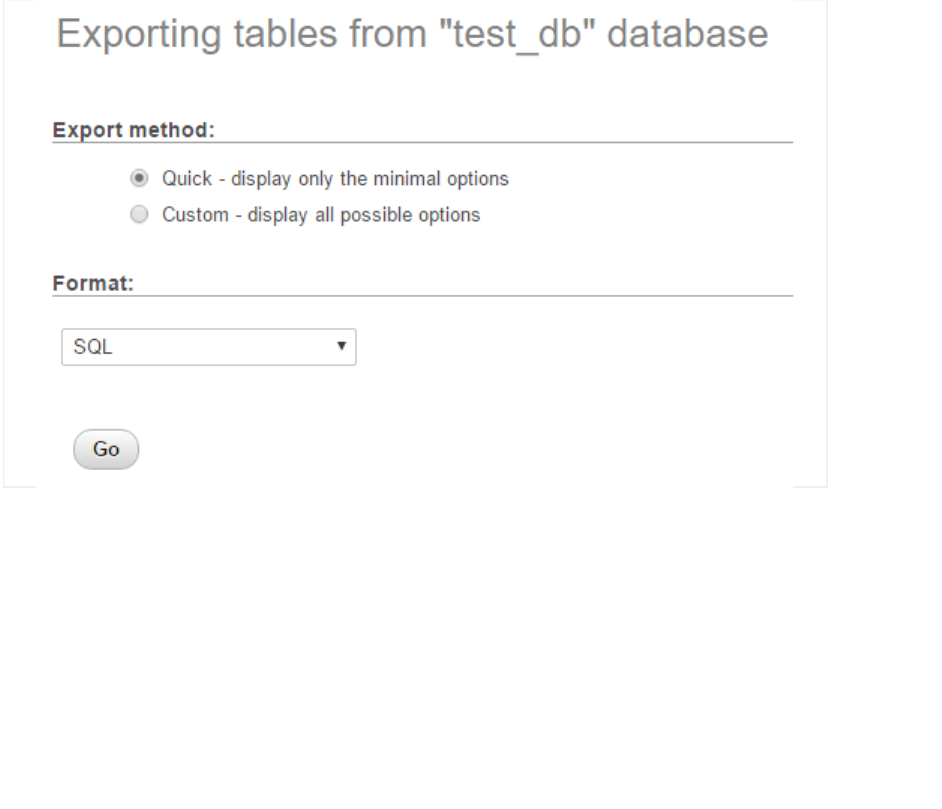
In the Export Method option, you can choose “Quick” or “Custom”. Custom will provide you
with more options to export your database.
We recommend choosing Quick, and then click the Go button to download your database.
Step 2: Upload WordPress Files to Live Site
Now we’ll need to move all your website files to the live site.
To get started, go ahead and open your FTP client and connect to your web hosting account.
Once you’re connected to your live site, make sure you upload the files in the right directory. For
example, if you want the site to be hosted on yoursite.com, then you would want to upload all
the files in your public_html directory.
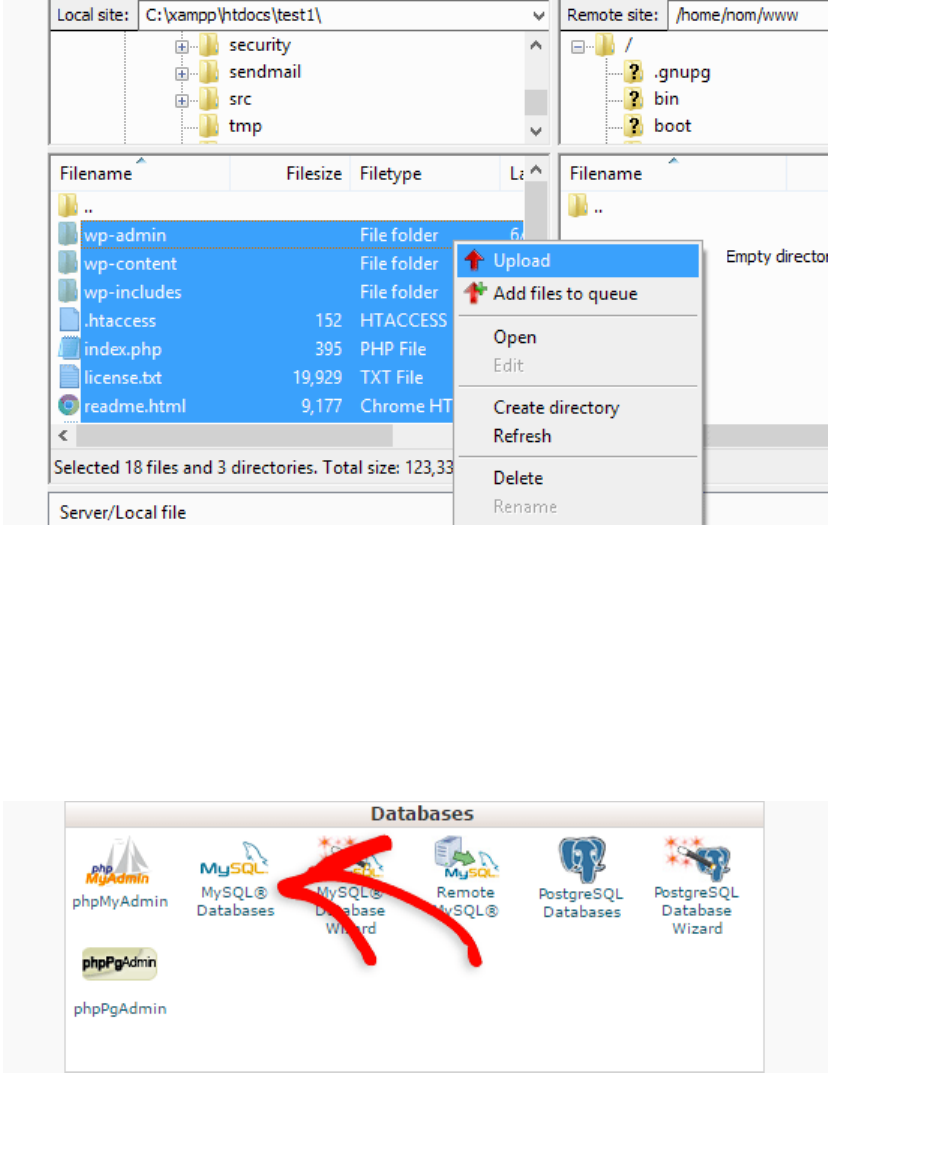
Now select your local WordPress files and upload them to your live server.
Step 3: Create MySQL Database on Live Site
While your FTP client is uploading your WordPress files, you can start importing your database
to the live server. Most WordPress hosting providers offer cPanel to manage your hosting
account, so we’ll show you how to create a database using cPanel.
First, you need to log in to your cPanel dashboard and click on the MySQL Databases icon
which can be found in the databases section.
On the next screen, create a database by entering a name for your database and clicking
the Create Database button.

After creating your database, scroll down to the MySQL Users section and create or add an
existing user to the database.
After adding the user, cPanel will take you to set MySQL privileges for that user. Simply grant all
privileges to the user by making sure every box is checked, and then click the Make
Changes button.
Step 4: Import WordPress Database on Live Site
The next step in the process is to import your WordPress database.
Go to your cPanel dashboard, scroll down to the databases section and click on phpMyAdmin.
This will take you to phpMyAdmin where you want to click on the database you created in Step
3. PhpMyAdmin will show your new database with no tables.
Click on the Import tab in the top menu. On the import page, click on Choose File button and
then select the database file you saved in Step 1.
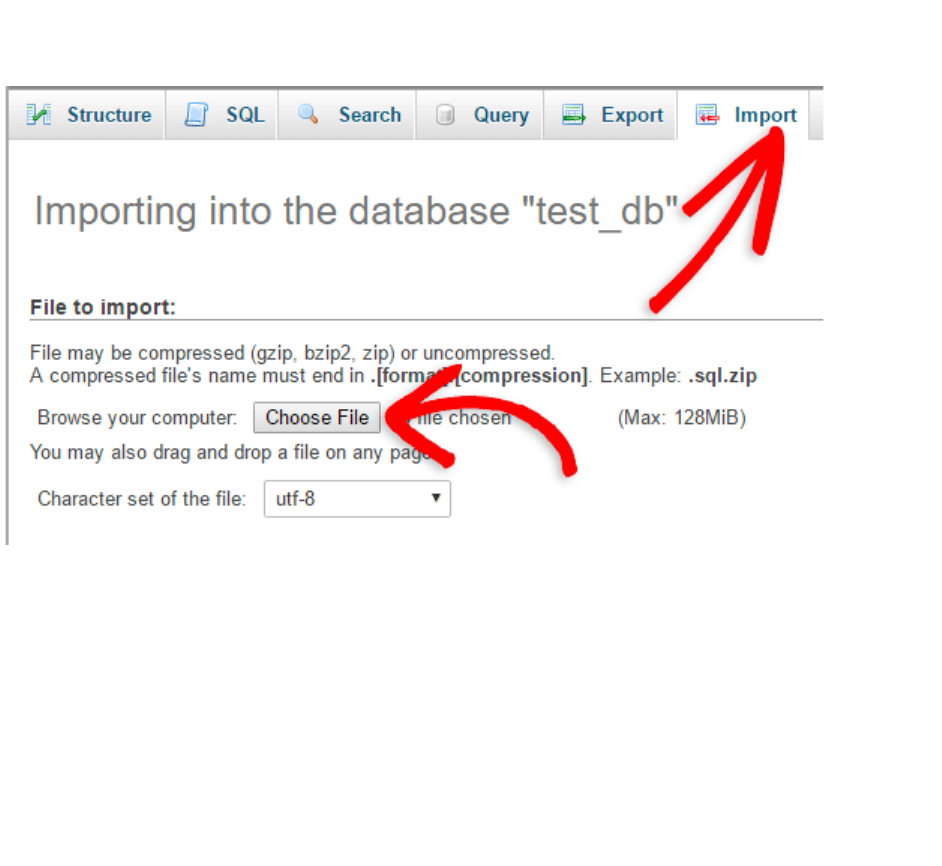
Lastly, press the Go button at the bottom of the page. PhpMyadmin will now import your
WordPress database.
Step 5: Change the Site URL
Now you need to change the site URL in your database, so that it will connect with your live
WordPress site.
In phpMyAdmin, look for the wp_options table in your database that we just imported in step 4.
If you changed your database prefix, then instead of wp_options it might be {prefix}_options.
Click on the Browse button next to wp_options or the link that you see in the sidebar to open
the page with a list of fields within the wp_options table. See screenshot below:

Under the field options_name, you need to look for siteurl. Click the Edit Field icon which can
be found at the far left at the beginning of the row.
When you click the edit field, an edit field window will appear. In the input box for option_value,
you will see the URL of your local install probably something like: http://localhost/test.
Carefully insert your new site url in this field, for example: https://www.wpbeginner.com
Save the field by clicking the Go button.

Next, you need to replicate this step for the option name: home. The wp_options page can be a
few pages long, so simply find the home tab.
Usually it is on the second page which you can navigate to by clicking on the pagination arrows
in phpMyAdmin.
Update the home url to be the same as your siteurl.
Step 6: Setup Your Live Site
Now that we have imported the database and all of our content should be uploaded, it’s time to
configure WordPress.
At this time, your site should be showing an Error Establishing Database Connection error.
To fix this, connect to your website using an FTP client and edit wp-config.php file.
You will need to provide the database name, user and password you created earlier in Step 3.
Next, save the wp-config.php file and upload it back to your server.
You can now visit your website, and it should be live now.
Next, you need to login to your WordPress admin panel and go to Settings » General. Without
changing anything, scroll to the bottom and click the Save Changes button.
This will ensure that the site URL is corrected anywhere else that it needs to be.

After that go to Settings » Permalink and click Save Changes to ensure that all post links are
working fine.
Step 7: Fix Images and Broken Links by Updating Paths
Whenever you are moving a WordPress site from one domain to another, or from local server to
a live site, you’ll face broken links and missing images.
You can either use the SQL query or use the Velvet Blues WordPress plugin.
For those who want to do it via SQL, here is a simple SQL query that should solve this problem:
1
UPDATE wp_posts SET post_content = REPLACE(post_content,
'localhost/test/', 'www.yourlivesite.com/');
Simply go to phpMyAdmin, click on your database and then click on SQL from top menu. Write
this query, but don’t forget to change it with your own local site and live site URLs.
That’s all, you have successfully migrated WordPress from localserver to a live site!
